

What's the best thing to do when you don't have the money to get what you want? Steal it?
No...but that's a story for another post.
Put on your crafty pants...it's time to take a photographic journey of cushy plushness.
I decided on a whim that I wanted a headboard for our bed, something I haven't had since I lived under my parent's roof, and something I haven't been able to afford. After doing a brief bit of research online, I found one I really loved.
Granted, this is not one that I could find for sale, but the ones I could find, that I did not like as much, were anywhere from $500-$2300! This first photo shows my inspiration! Short of selling a kidney, there was just no way. So I did a little digging, and found some how to blogs and videos. From there I did a little modification of technique to achieve the look I was going for. The rest is headboard history. Let the journey begin!
DAY ONE:
The first thing I did was get my supplies. Here's a list of all the things I used to make one queen size headboard:
* 4' x 5' sheet of pegboard (Home Depot will cut it for you if you ask nicely!)
* Glue (Gorilla glue or fabric glue)
* King size egg crate memory foam mattress pad, plus extra foam (You will see why shortly :) )
* Staple gun with Heavy duty staples
* Upholstery fabric of your choosing (mine was 54" x 72" because my fabric had a tiny bit of stretch, though you might want to purchase yours larger to be safe. Better to have too much and make a throw pillow than too small a piece!)
* Upholstery needle (or any long sewing needle, I used yarn darning needles)
* Buttons for tufting- you can use covered or not, but pick up some really basic cheap ones to use on the BACK side, this will hold your front decorative button in place and aid in the tufting so the thread doesn't pull through.
* Scissors
* THIMBLE-- I cannot stress this enough. I am sitting here typing with bruised fingertips covered in bandaids. Don't say I didn't warn you!
Overall you should expect to pay anywhere from $100-200 for supplies, assuming you have none of the above items at home already, and depending on how expensive the fabric is that you chose.
STEP 1:
Lay the pegboard on a covered surface. Unroll your foam (I preferred at least 2-3 inches to allow for comfort when sitting up reading in bed.) Trim foam as necessary. I discovered far too late that my math was wrong and the King size foam roll was not enough to do two full layers, but was just short as shown below. I wound up sacrificing a memory foam pillow to fill in the rest, which worked beautifully. It will be missed.

Adhere the foam together in pieces if necessary, but glue lightly to the pegboard, in a thin layer to ensure no glue seeps into any of the holes --we do not want any of them blocked by glue!
STEP 2:
Wait the appropriate amount of drying time as indicated by the glue bottle. Mine said to wait 1-2 hours minimum. Flip the board/foam over once it's dry enough to handle. Using a Sharpie, mark off where you want your holes to be. My original design looked like this:

I then realized that I had meant to do a "diamond" pattern in which each row is staggered, and so I changed the markings accordingly. I also realized my initial plan of holes every 5 inches was too close together (and made for 99 buttons to be sewn...YIKES!) So this was revised also. Live and learn :)
STEP 3:
After you have your holes marked, you will want to lay your fabric face down on the floor, put your foam/pegboard piece on top of it, and use the staple gun to secure the edges. Start with one edge, have someone hold the opposite edge snug, and staple that side, then go to the opposite side and staple. Repeat with the other two sides, always doing one side, then the opposite side next. It should be uniformly snug, but not too tight, because it will tighten further once you start tufting. Once that's done, find something to use as a "saw horse" (I used three dining room chairs) and something to sit on, like an ottoman. It is the perfect height to allow you to work on top and underneath your creation. Find a lovely assistant such as mine (see below) to assist in this maneuvering. Tip: I also used a thin polyester batting over the foam, but under the fabric, just to ensure a smooth finish.
 |
| You can see the revised hole markings here! :) |
 |
| You should now have something that looks like this. |
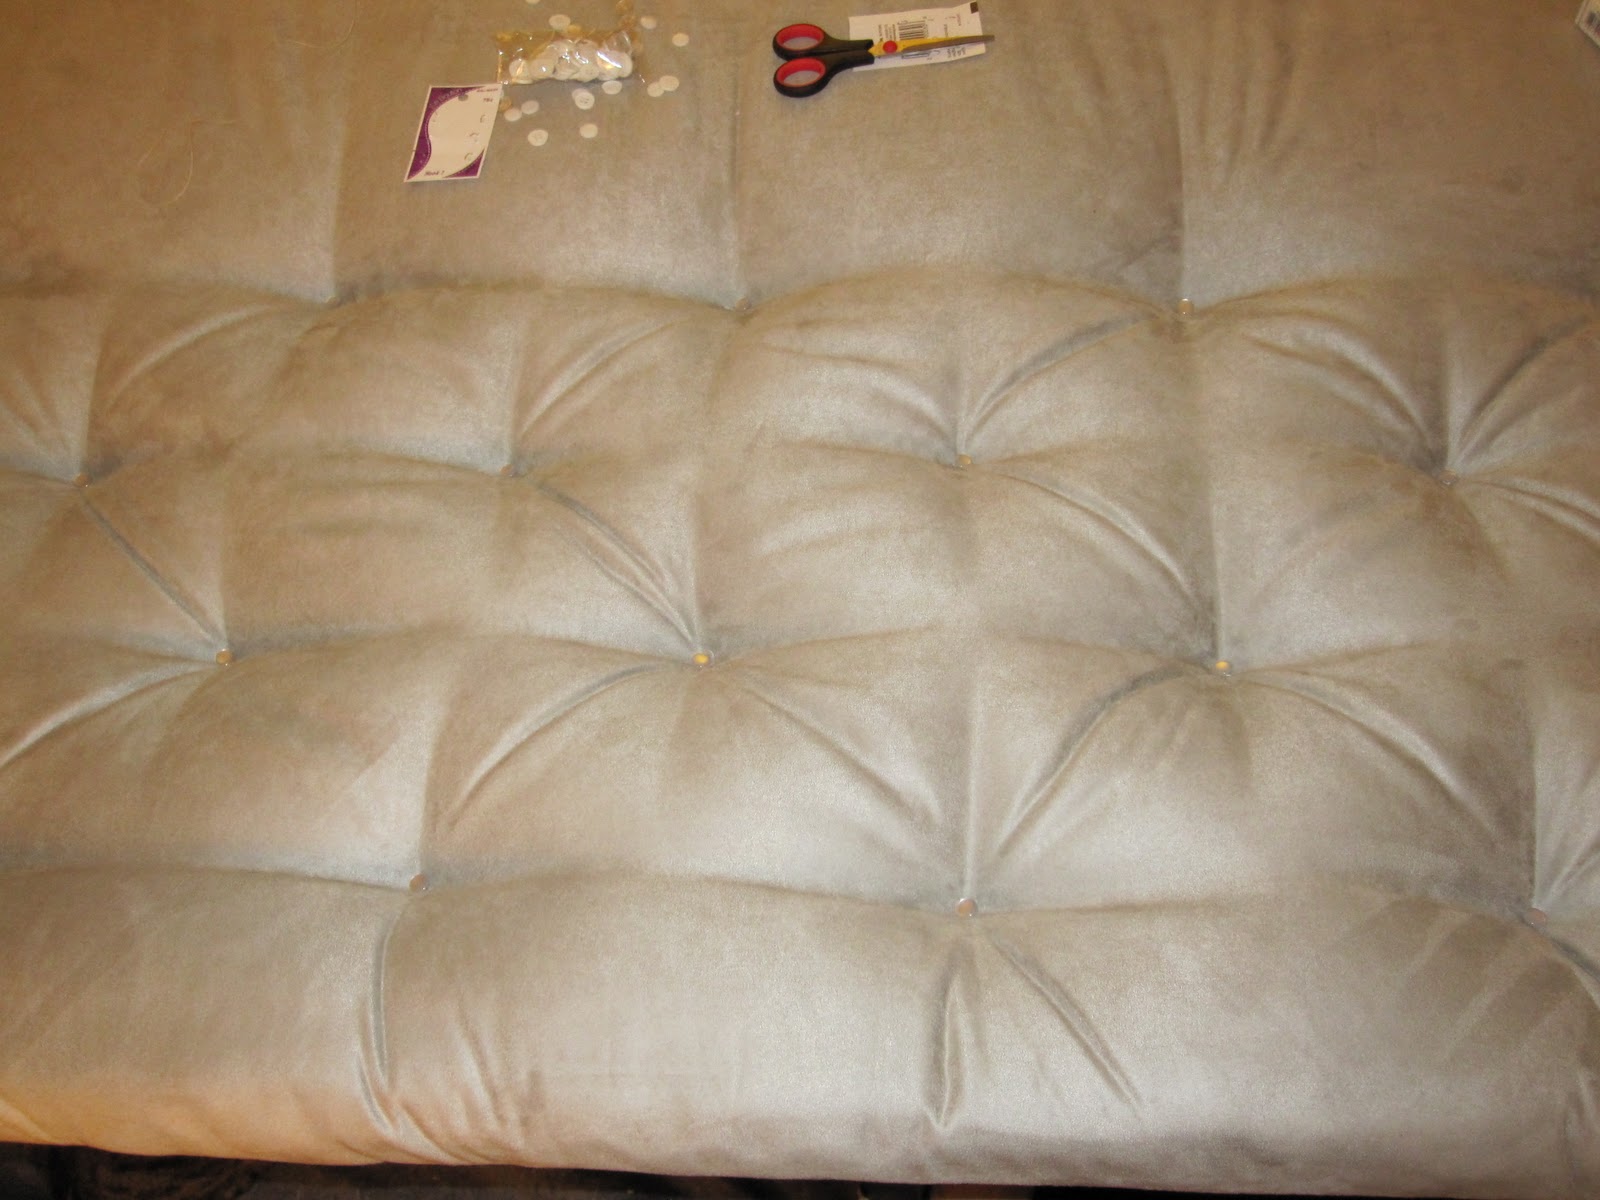
This step is hard to describe, but you are going to thread your needle and tie a knot at one end. Thread on one of your "cheap" buttons and sew through the BOTTOM of the pegboard (where your markings are) first. Careful not to poke your hands!! When you go back down, it will take some finagling to get the needle through the peg-hole, but when you do, pull the thread VERY tightly, and pinch down with your hand like so to create the "dent" that your decorative button will go in. Repeat this two or three times, before sewing on the decorative button.


STEP 5:


Also makes a great dog/cat fort.
Well, those two handsome boys there (Loki the cat, and Bear the dog) are telling me it's long past my bedtime. So goodnight all, and tomorrow (or the next day, whenever my fingertips heal) I will be finishing the second half of the tufting and posting the final finished product on display.
I hope everyone enjoyed this "little" project. It's rather easy to do "skill-wise" just time consuming, and a little tedious, but so far, seems to be well worth it, to achieve a finished product which would otherwise be well out of my price range!
Good luck and happy headboarding!
~Rose
No comments:
Post a Comment